Pages

Tuesday, 24 December 2013

Large Wall Art (Older Children and Adults)

Creates a Christmassy glow in any room!

These are created with big sheets of paper or paper sellotaped together. The shapes/characters are drawn and painted. Once dried, they're cut out and stuck on the walls. These are great for small children, but are better if they're made by children aged 9 years + or adults.

Santa
My very first design, inspired by the nursery I was a student at.

Penguin
Creates the wintery feel in our dining room

Rudolph The Red Nosed Reindeer
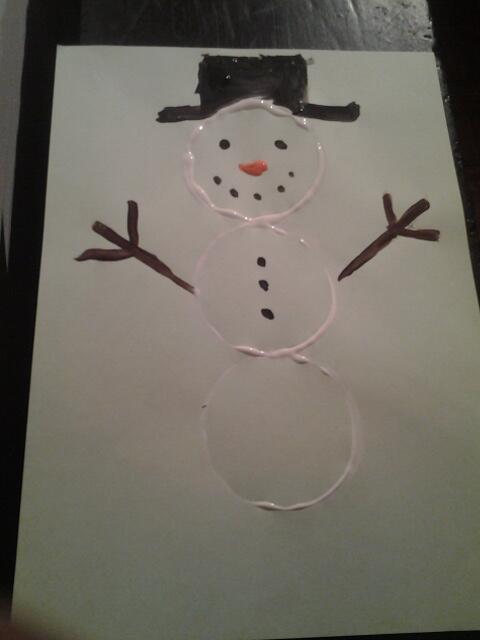

Snowman
Helping create a wintery feel in our dining room

A Jolly Elf!

Christmas Tree
The presents and the star are extras and blue tacked to the wall

Snowflakes

Great if you hang from different lengths of fishing wire!

You will need:

~ Paper 
~ Scissors
~ Fishing wire (or alternative)

Method:

1) Fold the paper and cut designs to make the snowflakes
2) Can be stuck to the walls or can be hung from the ceiling with different lengths of fishing wire to create a snowing impression

Suitable for 8 years +


Paper Bag Decorations

Great decorations which encourages recycling!

You will need:

~ Paper bag
~ Scissors

Method:

1) Fold the bag and cut out shapes to create chains
Christmas Trees

Gingerbread Men

Advent Tree

A lovely idea for advent!

You will need:

~ A Christmas tree template
~ 24 bauble templates
~ A star template

Method:

1) Allow children to decorate the tree.
2) Decorate and cut out 1 bauble every day from 1st December. Add to the tree.
3) Decorate and glue the star on, on Christmas day

This craft is suitable from 2 years +


Snowman Nails

A wintery design!

You will need:

~ White, orange and black nail varnish
~ Small nail brush

Method:

1) Prepare the nails
2) Paint the nails white. Allow to dry
3) Use the nail brush to paint an orange carrot nose
4) Use the nail brush to paint on eyes and a mouth in black nail varnish. Allow to dry

You could use a clear nail varnish to top the nails.


Gingerbread House

This was made using a kit bought from Lakeland. It only contained the cutters, but had the gingerbread and icing recipes on the back of the box.

Suitable for 15 years +

Holly Wreath

Very spiky! Suitable for older children, young people and adults

You will need:

~ Oasis
~ Holly
~ Decorations (Berries, pine cones, ribbon etc)

Method

1) Soak the oasis in water overnight
2) Put holly into the oasis to create the wreath
3) Add any decorations

This craft is suitable for 12 years +

Paper Stocking

A sweet craft to hang above the fireplace

You will need:

~ Stocking template
~ Materials to decorate
~ Catalogue (optional)

Method:

1) Allow children to decorate the stocking
2) OPTIONAL: Cut out and stick pictures from a catalogue to make a Christmas Wishlist

This craft is suitable for 18 months + with assistance


Cotton Wool Santa

A beautiful craft with new textures

You will need:

~ Santa template
~ Glue
~ Cotton wool

Method:

1) Cut out the Santa template
2) Put glue onto the template and stick on blobs of cotton wool

Alternatively, have a template big enough to glue on 25 cotton wool balls and use it as an advent calendar

This craft is suitable for 2 1/2 years +


Paper Santa

A paper craft decoration, originally from DLTK.com

You will need:

~ Printer
~ Paper
~ Scissors
~ Glue
~ Materials to decorate

Method:

1) Print the template from here:
2) Cut out and glue template together as instructed here
3) Decorate!

This craft is suitable for 2 years +

Candy Cane

Candy Canes for Christmas!

You will need:

~ Materials to decorate
~ Candy cane template

Method:

1) Allow children to decorate the candy cane however they want
This craft is suitable for 15 months +

Gingerbread Man

"You can't catch me, I'm a gingerbread man!"

You will need:

~ Paint or materials to decorate
~ Gingerbread man template

Method:

1) Allow children to decorate the gingerbread man

This craft is suitable for 15 months +

Crackers

A cute craft for Christmas!

You will need:

~ Paint
~ Cracker template (we cut ours ourselves)

Method:

1) Allow children to finger paint their cracker

Alternatively, use other decorations such as glitter, sparkles, stickers, pompoms, pencils etc.

This craft is suitable for 2 years +

New Year Calendar

Great craft! Also good for presents for parents/carers, grandparents and other family members

You will need:

~ A4 card
~ Ribbon
~ Calendar
~ Materials to decorate with

Method:

1) Hole punch 2 holes in the card and tie the ribbon into a hook
2) Glue the calendar to the bottom of the card
3) Allow children to decorate the card however they like

This craft is suitable for 12 months +

Handprint Gifts

This is a lovely little craft that I made with the children I look after to give to their parents on Christmas morning!

You will need:

~ Air drying clay

Method:

1) Roll the clay out and into a circle. Press the child's hand into the clay, ensuring that an imprint is left. Leave to dry (usually takes 48 hours).

We wrapped ours using holly gift wrap (store bought) and paired it with a Holly Gift Tag and Light Bulb Christmas Card

These can be painted.

This craft is suitable for 3 months + with adult help

Light Bulb Christmas Card

Adorable hand made card to treasure!

You will need:

~ 5 colours of paint
~ Black pen
~ Card

Method:

1) Paint 5 different coloured finger prints along the card. Allow to dry.
2) Use the pen to draw a wiggly line that joins up all the finger prints. This creates the wire for the lights.

This craft is suitable for 3 years +

Holly Gift Tag

Great when wrapping presents!

You will need:

~ Green and red paint
~ Small rectangle of card or strong paper
~ Holepunch
~ Ribbon

Method:

1) Put two green finger prints next to each other on the card
2) Put one red finger print in the middle of the finger prints to create the holly. Allow to dry
3) Hole punch the card and tie the ribbon through the hole

You could add a message to the front of the tag

This craft is suitable for 3 years +

Handprint Robin

Adorably sweet little Robins!

You will need:

~ Brown and red paint
~ Googly eyes
~ Paper
~ Scissors
~ Glue
~ Paintbrush

Method:

1) Paint a brown oval on a sheet of paper
2) Make 2 brown handprints on another sheet of paper. Allow to dry.
3) Cut out the handprints and oval. Glue the handprints to the oval to make the wings. 
4) Paint a red oval on the brown oval to make the red middle
5) Glue on googly eyes

This craft is suitable for 2 1/2 years + with guidance and supervision

Footprint Reindeer

A sweet little memory of your little one's Christmas!

You will need:

~ Brown, yellow and red paint
~ Paintbrush
~Googly eyes
~ Paper
~ Scissors

Method:

1) Make a brown footprint on the paper
2) Mix brown and yellow paint to create the colour for the antler. Paint on antlers from the heel
3) Paint a red circle at the toes for the red nose
4) Glue two googly eyes to the footprint
5) Once dry, cut out

Allow children to use other colours and add decorations or glitter

This craft is suitable for 12 months + with assistance. 6 years + with supervision.

Paper Elf

Originally not mine, but found on DLTK.com. Fun for children of all ages!

You will need:

~ Printer
~ Paper
~ Scissors
~ Glue
~ Things to decorate with (pencils, paint, chalk, stickers etc)

Method:

1) Print out the following template by clicking here
2) Cut our and glue together as instructed here
3) Decorate!

Allow children to use whatever colours and decorations as they'd like. Let them express their creativity!

This craft is suitable for 12 months + with assistance

Handprint Holly Wreaths

A simple, fun alternative to normal holly!

You will need:

~ Green and red paint
~ Paper
~ Scissors
~ Glue
~ Bow (optional)

Method

1) Make 12 green handprints on sheets of paper. Allow to dry.
2) Once dry, cut out handprints. Glue together in a circle, gluing each thumb to the back of another hand.
3) Add berries with red fingerprints.
4) OPTIONAL: Add a bow! We found it difficult to glue with PVA, but superglue works well.

Allow children to use other colours
Can be used for any time of the year by using different colours
Use rainbow handprints to make a fun, colourful, all year round decoration!

This craft is suitable for 3 years + with assistance

Monday, 2 December 2013

Christmas Tree Decorations!

These sweet Christmas tree decorations are a perfect memory of Christmas that can be hung on the tree year after year.

You will need:

~ Cardboard (we used old cereal packets, but you may want to use stronger cardboard)
~ Scissors
~ Glue
~ Glitter
~ Hole Punch
~ String or Ribbon

Method:

1) Cut out shapes from the cardboard.
2) Hole punch the top of the shape.
3) Glue glitter onto the shape. Allow to dry.
4) Tie a piece of ribbon or string through the hole in the shape to create a loop that you can use to hang on the tree.

This craft is suitable for 15 months + with close supervision.

Make sure you write you child's name, age and/or the date on the back of the decoration. 

Allow children to decorate however they want to. You don't have to use glitter!

Paper Cup Snowman

A new medium for children to experiment with!

You Will Need:

~ Paper Cup
~ Dark Paper (works better on darker coloured paper)
~ Paintbrush
~ Paint - white, black, brown and orange

Method

1) Dip the paper cup into the white paint and paint 3 connected circles on the paper
2) Paint on a hat, eyes, carrot nose, mouth, buttons and arms. You could also add a scarf, or any extras.


This craft is suitable for 18 months +. 

Allow children to be as creative as they like, by adding glitter, snowflakes, stickers or whatever they want to add.

Sunday, 1 December 2013

Winter Bunny

A simple craft for children of all ages! Idea taken from DLTK.com

You Will Need:

~ Printer
~ Paper
~ Scissors
~ Paint, pens, pencils (our bunny was painted). Light blue, dark blue and pink
~ Glue
~ Glitter (optional)

Method:

  • Print out the template of choice.
     
  • Colour (where appropriate) and cut out the template pieces.
     
  • Glue the bunny together in the following order (refer to the small 'finished craft' image on the template for further guidance):
     
    • glue the big foot onto the back of the body, so the straight edge of the foot lines up quite evenly with the edge of the body.
       
    • glue the small foot onto the back of the body/big foot, so the curved edge of the foot lines up quite evenly with the edge of the body.
       
    • glue the arms on, positioning as you prefer.  If you glue the arm on the curved side of the dress BEHIND and the arm on the straight side of the dress ON TOP it gives the bunny a 3D look
       
    • glue the head on top of the body
       
    • glue the hat onto the head
       
    • glue the bow on top of one of the ears for a girl bunny or underneath of the chin for a boy bunny.
       
    • glue the snowflake to the center of the body
       
    • glue the snowball into one of the hands
       
  • See picture on the template for further help

Templates are available here


This craft is suitable for 2 years +, as long as they have help cutting out some of the shapes.

Allow children to use different coloured paints to the ones we used, or add decorations to it. Don't add the snowflake and you can use the bunny craft all year round!